Have you ever wanted to design a beautiful website but just didn’t
know how? To be honest, a few years ago, that happened to me too. While
browsing the web, I saw so many nice looking websites and wished I had
the skills to create such designs. Today I can and I’m going to teach
you how to do so too! Essentially, it requires a few Photoshop skills
and an eye for detail. Through this tutorial, I will point out these
tiny details which make a website design look beautiful. Fire up
Photoshop and let’s get going!

find them on the 960.gs official website. Simply unpack the zip file and look for PSD templates. You will see that there are
two different types of templates: one is 12_col and the other one is 16_col. The difference between these two are, as the name suggests, one is made with 12 columns and the other one with 16 columns. To explain it a bit more, if you have 3 boxes in your design you would choose the 12_col grid, because 12 is divisable by 3; or if you have 4 boxes in your design, you would choose either 12_col or 16_col grid because 12 and 16 are divisable by 4. If you follow this tutorial, you will see this in action.
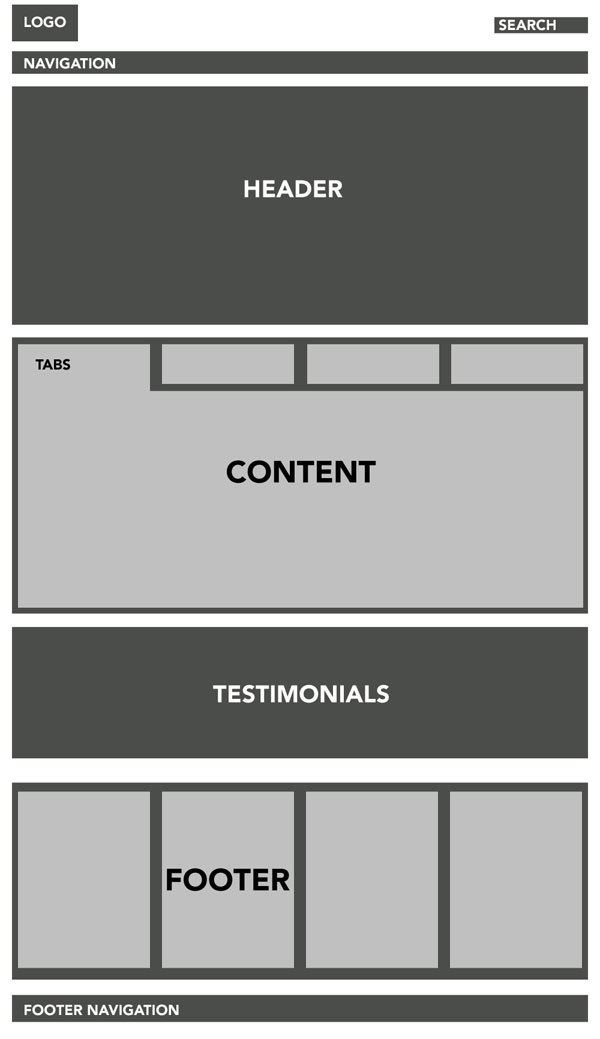 Before
we open our PSD grid template and begin drawing, we first need to
define the structure of our site. This is a bit more of a complicated
structure because we have a layout inside a layout. You can see this
exemplified in the image above.
Before
we open our PSD grid template and begin drawing, we first need to
define the structure of our site. This is a bit more of a complicated
structure because we have a layout inside a layout. You can see this
exemplified in the image above.
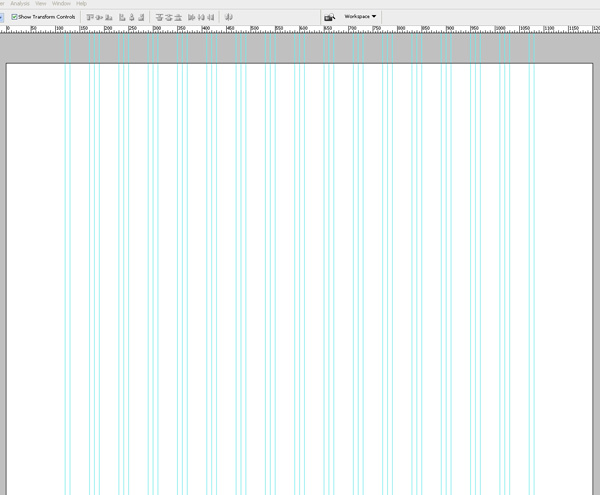 After
we’ve defined our site structure we’re ready to move on. Open your
16_col.psd template. Go to Image > Canvas size . Set the canvas to
1200px wide and 1700px high. Set the background color to #ffffff.
After
we’ve defined our site structure we’re ready to move on. Open your
16_col.psd template. Go to Image > Canvas size . Set the canvas to
1200px wide and 1700px high. Set the background color to #ffffff.
 Now pick the Rectangle Tool and draw in a rectangle the full canvas width and about 80px high. Fill it with the color #dddddd.
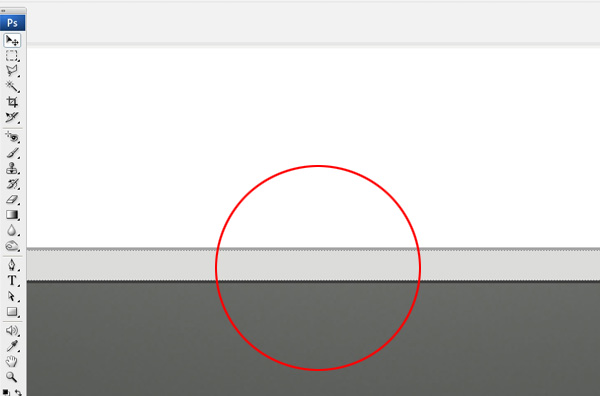
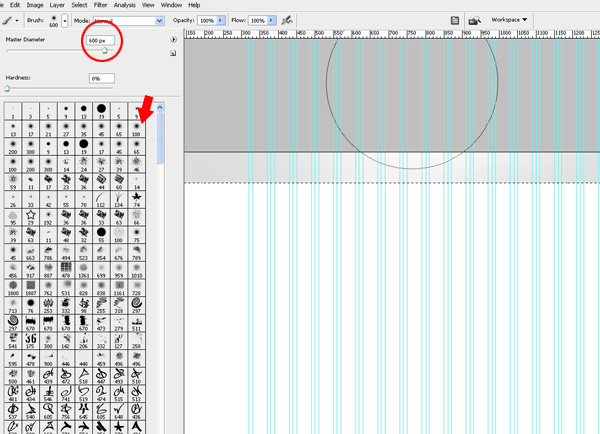 Create a new layer above the rectangle and set Layer mode to Overlay. Ctrl+click the rectangle layer. Now the rectangle will be selected. Choose a 600px soft brush,
set the color to white, and click a few times with the edge of the
brush just a bit over the selection, like shown on the image. This way
you create a nice, subtle light effect. Additionally you can link these
two layers.
Create a new layer above the rectangle and set Layer mode to Overlay. Ctrl+click the rectangle layer. Now the rectangle will be selected. Choose a 600px soft brush,
set the color to white, and click a few times with the edge of the
brush just a bit over the selection, like shown on the image. This way
you create a nice, subtle light effect. Additionally you can link these
two layers.
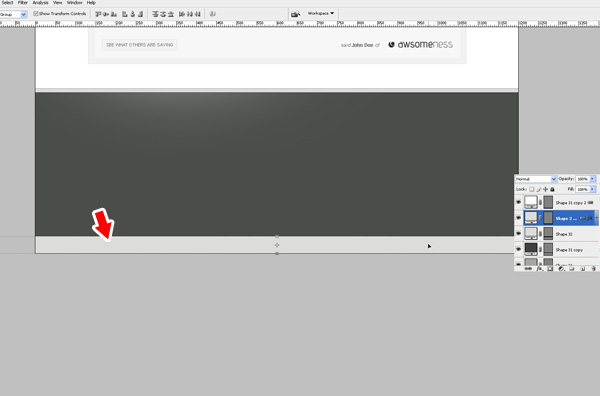
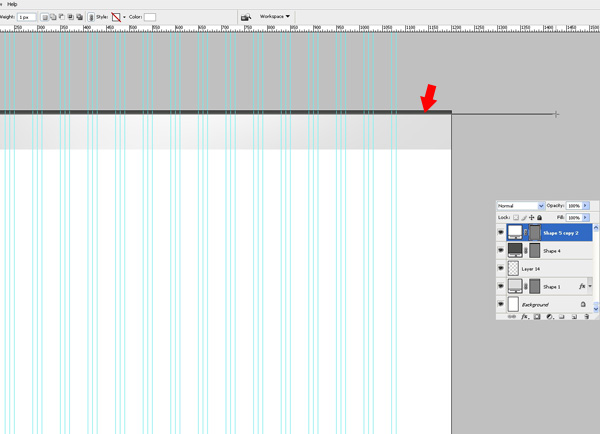 New layer. Choose the Rectangle tool again and draw in a thin dark grey rectangle, as shown in the image.
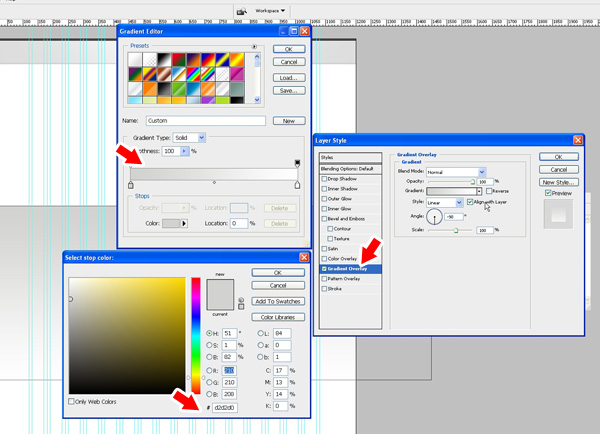
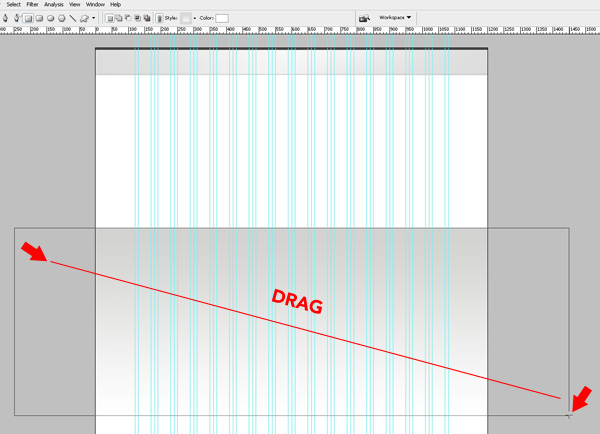 With the Rectangle tool selected, draw in a big box around 500px underneath the top rectangle. Make it 575px high and give it a Linear Gradient overlay from #d2d2d0 to #ffffff, direction -90, Scale 100%.
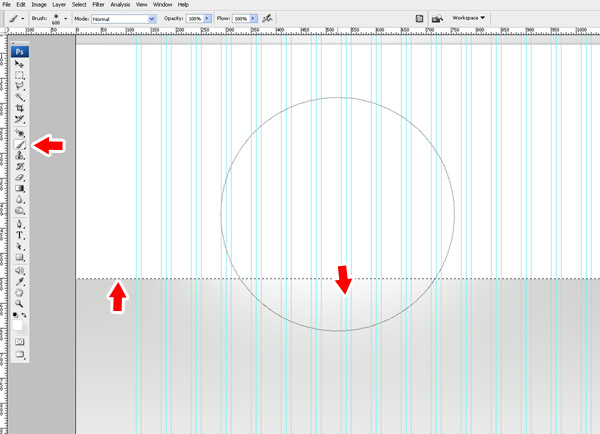 Now we are going to create the same light effect as described in Step 5. We will be using this technique a lot; so next time I will just refer you to Step 5 for the effect.
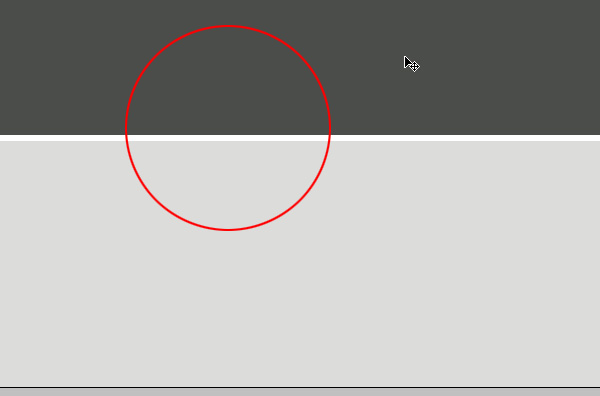
Create a new layer above all the current layers. Ctrl+click the big rectangle. Choose a 600px soft brush, set the color to white, and click a few times with the edge of the brush just a bit over the selection, as shown in the image.
 Create
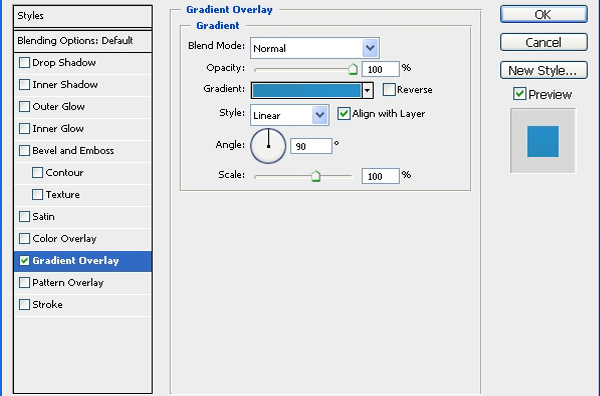
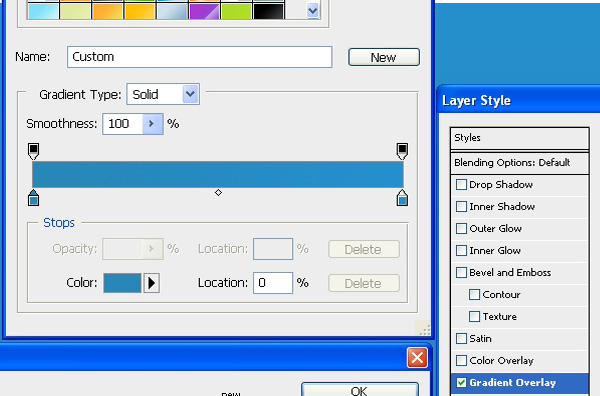
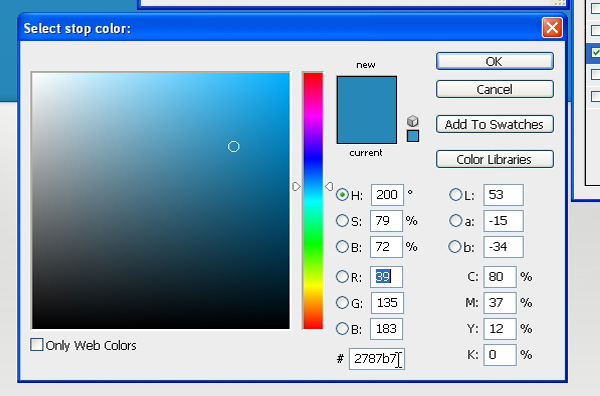
a new layer and draw in a big rectangle about 400px high. This one is
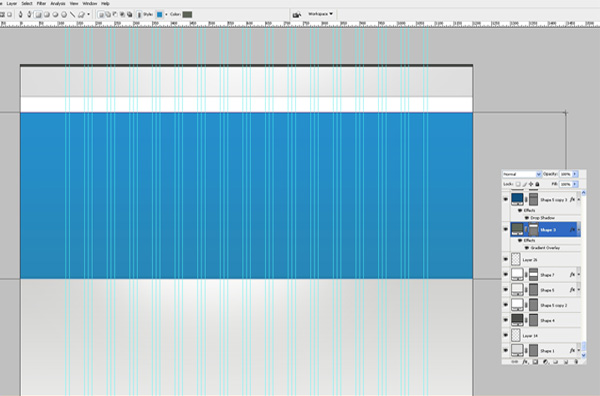
used for our header. Fill it with a nice blue gradient from #2787b7 to #258fcd.
Create
a new layer and draw in a big rectangle about 400px high. This one is
used for our header. Fill it with a nice blue gradient from #2787b7 to #258fcd.
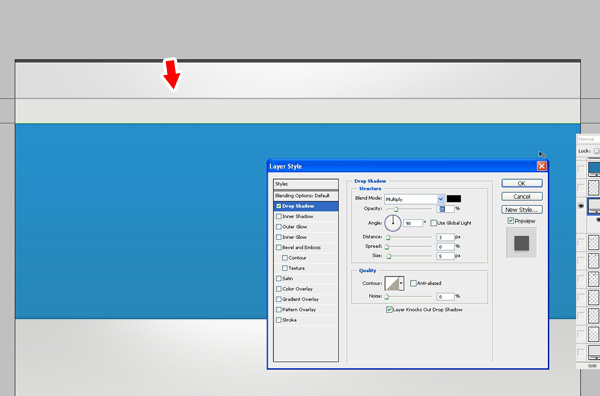
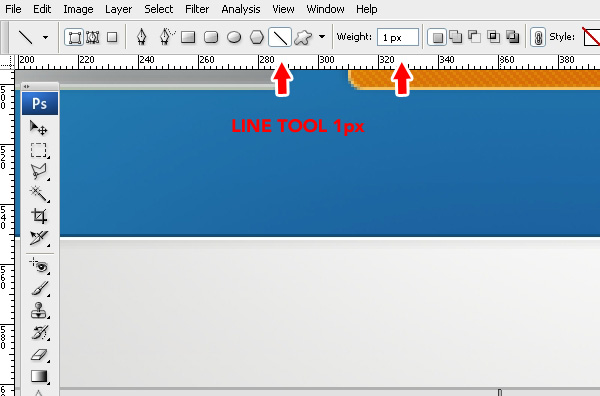
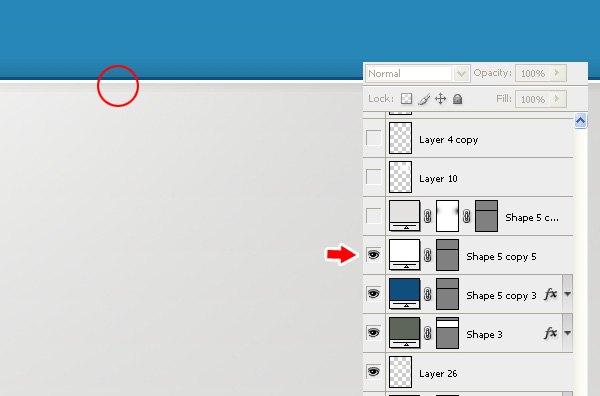 Add a dark blue 1px line on the bottom of the header box, apply the Drop shadow
effect. For drop shadow use Blend mode: Multiply, Opacity: 65%, Angle:
-90, Distance: 1px and Size: 6px. Next, create a new layer above and
draw another 1px white line under the dark blue one. This way we create
sharp edges for our content box. Basically you can apply this border
technique on every box in your design just with different colors.
Add a dark blue 1px line on the bottom of the header box, apply the Drop shadow
effect. For drop shadow use Blend mode: Multiply, Opacity: 65%, Angle:
-90, Distance: 1px and Size: 6px. Next, create a new layer above and
draw another 1px white line under the dark blue one. This way we create
sharp edges for our content box. Basically you can apply this border
technique on every box in your design just with different colors.
 Create a new layer, and with the Rectangle Tool, draw a 50px high rectangle in the top part of the canvas, just as shown in the image. This will be used for our navigation.
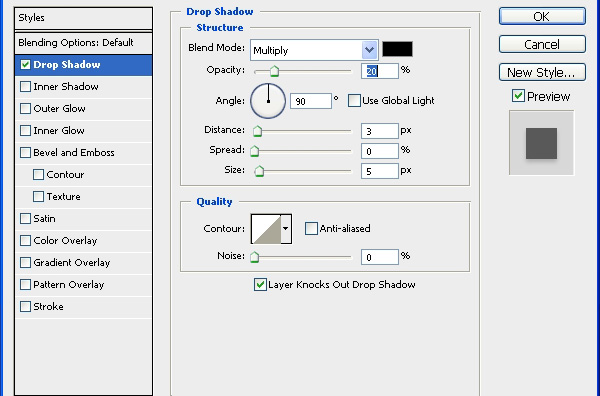 Apply a Drop shadow. Use the values shown in the image.
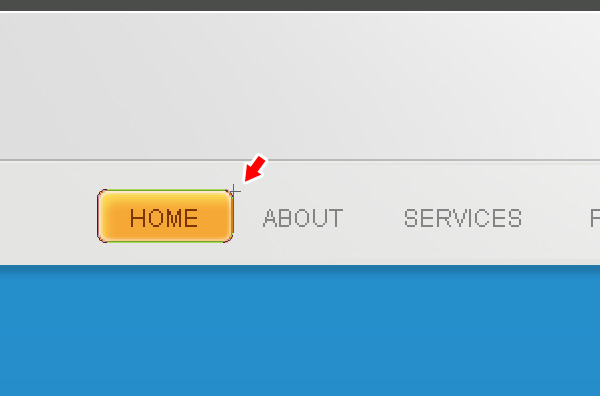 Time for the navigation. Use the Rounded Rectangle Tool and set the radius to 5px. Draw a rectangle, fill it with #f6a836, and apply the following effects:
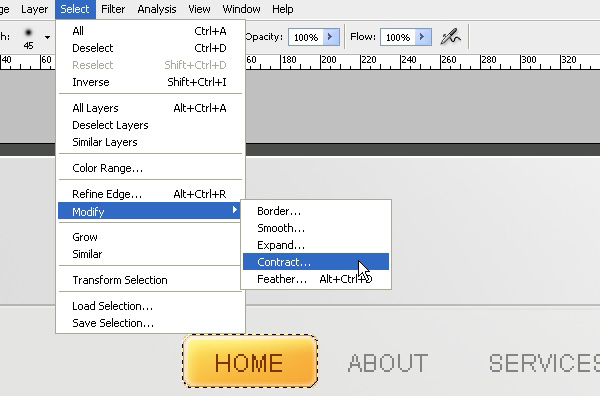 Now select the rectangle with Ctrl+click. Go to Select > Modify > Contract and enter 1px.
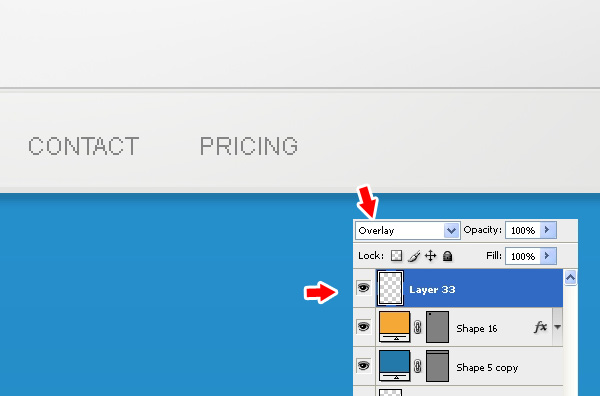 Create a new layer above, set the Blend mode to Overlay and create the same effect described in the Step 5 using a smaller brush size this time. Then add the navigation text. I used Arial for navigation links, all caps and Antialias set to “none”.
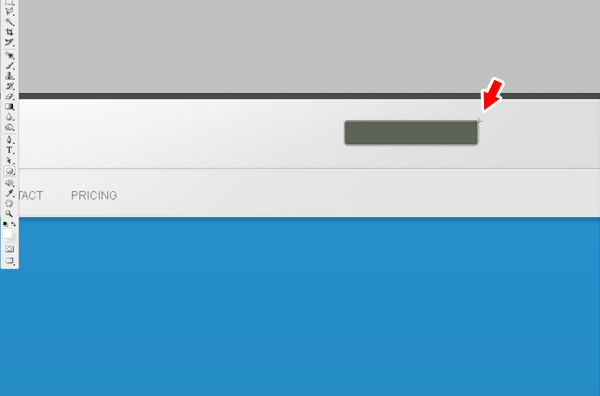
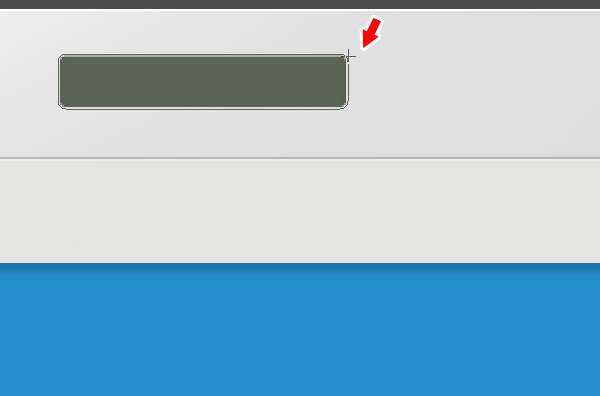 Now let’s create the search box. With the Rounded Rectangle Tool, radius 5px, create a search box positioned on the right side of the grid layout and in the middle of the top gray stripe from Step 4. Add these layer styles:
 I added the “search” text and a light gray “GO” button. This is how it should look.
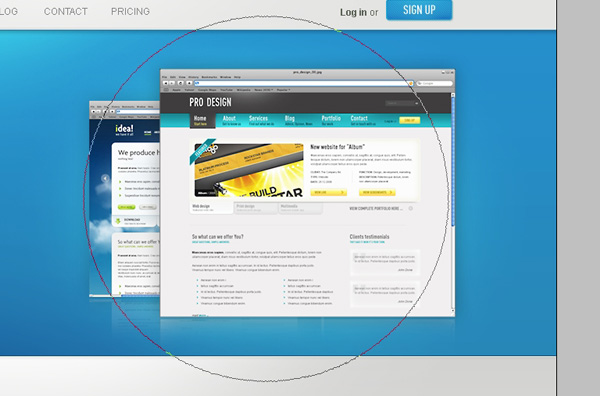
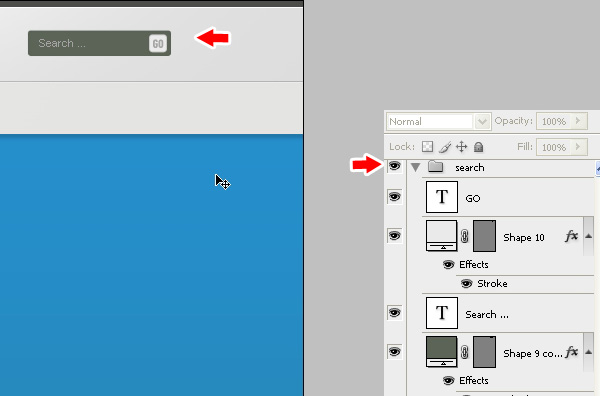 So far we have a lot of layers and need to organize things a bit so we will create a new Layer folder and name it “search”. Select all layers that make the search field and just Click + drag
inside the new folder. Later we’re going to organize other content
inside the folders so we have a nice organized layer palette.
So far we have a lot of layers and need to organize things a bit so we will create a new Layer folder and name it “search”. Select all layers that make the search field and just Click + drag
inside the new folder. Later we’re going to organize other content
inside the folders so we have a nice organized layer palette.
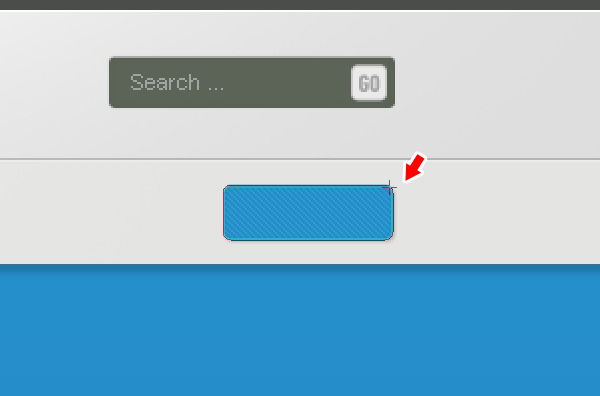 Now
create a new layer and draw a “Sign Up” button the same way we created
the search field – just half the width. Place it under the search field
in the middle of the navigation stripe.
Now
create a new layer and draw a “Sign Up” button the same way we created
the search field – just half the width. Place it under the search field
in the middle of the navigation stripe.
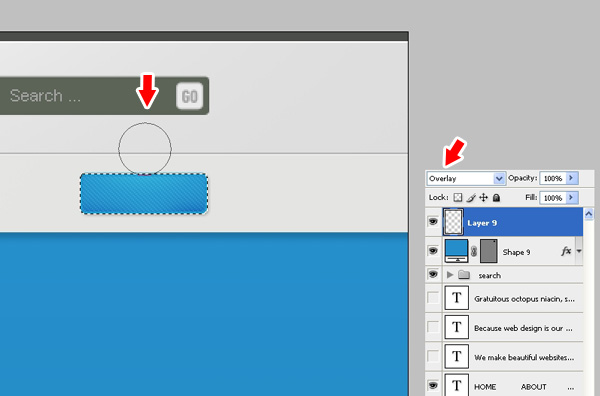 Again we’re creating the effect from Step 5.
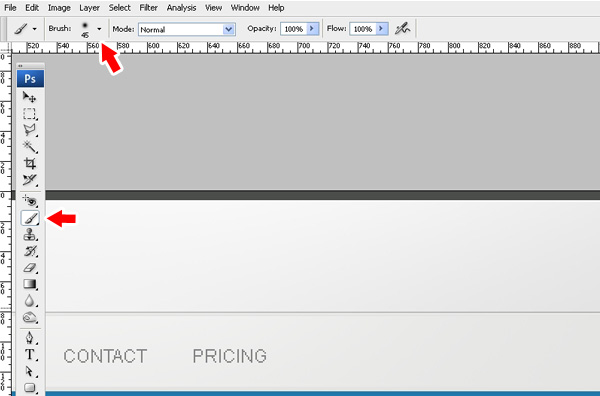 Use a smaller soft brush size. In this case it was 45px.
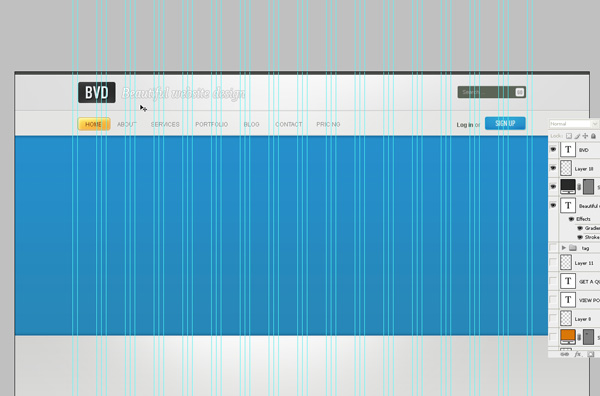 After adding the logo and the Tagline this is how our site should look like now.
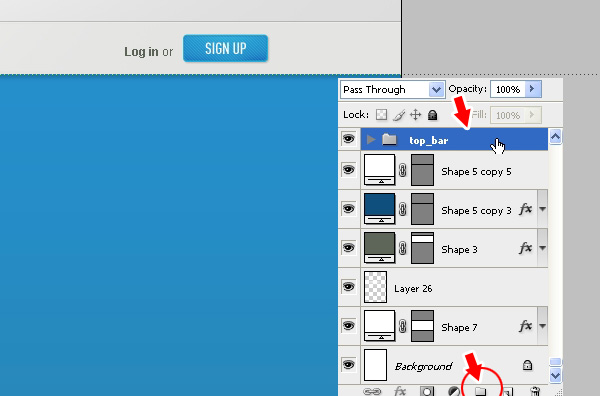 Now
we’re coming back to our layer organization mentioned a few steps
earlier. Create a new empty layer folder and name it “top_bar”. Move all
graphics from the top of the layout inside this folder (logo, tagline,
search field, sign up button, navigation and backgrounds).
Now
we’re coming back to our layer organization mentioned a few steps
earlier. Create a new empty layer folder and name it “top_bar”. Move all
graphics from the top of the layout inside this folder (logo, tagline,
search field, sign up button, navigation and backgrounds).
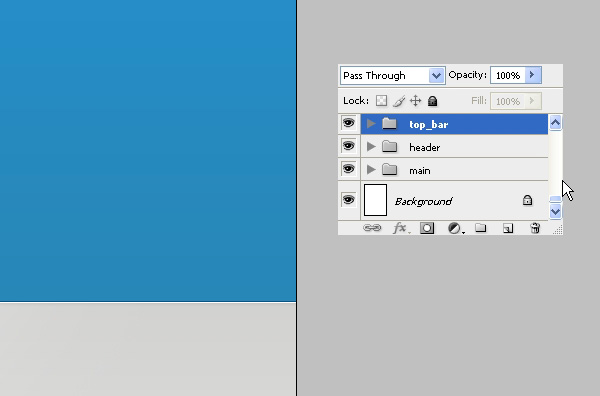 Create
another empty layer folder and name it “header”. This is where we will
put our header graphics. This is how it should look.
Create
another empty layer folder and name it “header”. This is where we will
put our header graphics. This is how it should look.
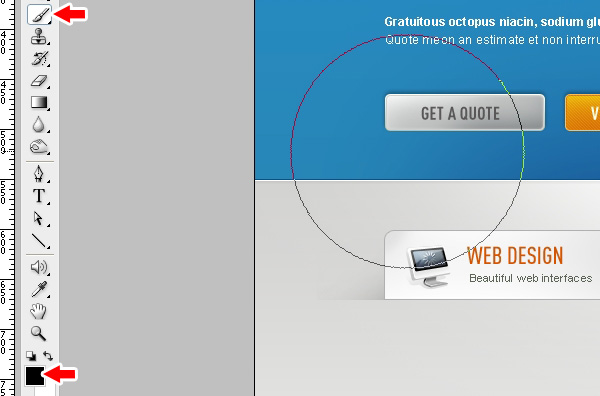
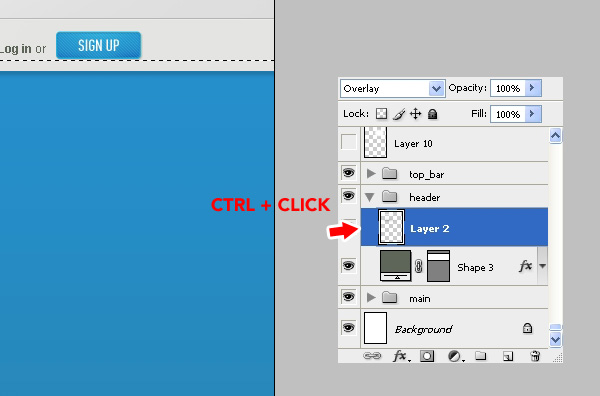 Our
header looks a bit plain right now so we’re going to add the same light
effect everywhere else on the site. Select the header box (blue).
Create a new empty layer above and set the mode to Overlay.
Our
header looks a bit plain right now so we’re going to add the same light
effect everywhere else on the site. Select the header box (blue).
Create a new empty layer above and set the mode to Overlay.
 Pick a large soft brush 600px, color #ffffff
and click a few times in the area under the navigation. Furthermore, to
gain more depth, we can switch the color to black and do the same thing
just in the bottom part of the header. Give it a try!
Pick a large soft brush 600px, color #ffffff
and click a few times in the area under the navigation. Furthermore, to
gain more depth, we can switch the color to black and do the same thing
just in the bottom part of the header. Give it a try!
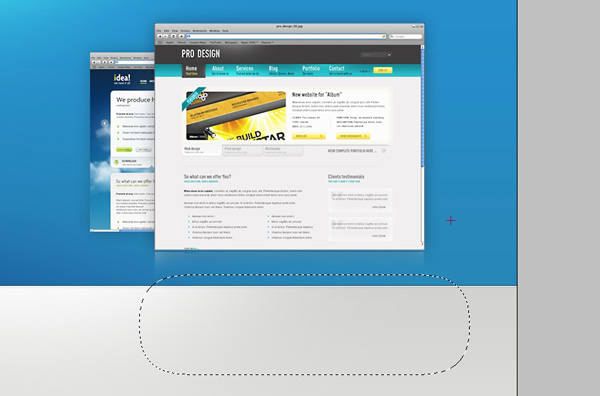 In
this step I will explain to you how I created the reflection for the
header images. Take two images of your choice, I used Safari screenshots
of my two other templates, scale one down and place it behind the
bigger one. Copy both layers, and with the Free Transform Tool,
flip the first image and then the other one. Shift both images a few
pixels down. Now make a selection from outside the bottom part to middle
of the first flipped image with the Rectangular Marquee Tool. Go to Select > Modify > Feather and type 30px or more. You should have a selection similar to the shown in the image. Press the delete key a few times and you will create a nice faded reflection from the original image. Repeat this step for the second image.
In
this step I will explain to you how I created the reflection for the
header images. Take two images of your choice, I used Safari screenshots
of my two other templates, scale one down and place it behind the
bigger one. Copy both layers, and with the Free Transform Tool,
flip the first image and then the other one. Shift both images a few
pixels down. Now make a selection from outside the bottom part to middle
of the first flipped image with the Rectangular Marquee Tool. Go to Select > Modify > Feather and type 30px or more. You should have a selection similar to the shown in the image. Press the delete key a few times and you will create a nice faded reflection from the original image. Repeat this step for the second image.
 Now to make those two images stand out a bit, create a new layer and set the mode to Overlay. Create the effect described in Step 5.
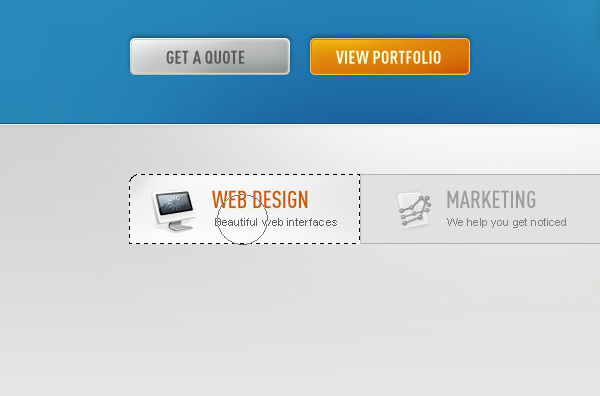
 This
is how our header should look after adding a nice tagline and some
buttons. Don’t forget to put all these graphics inside the “header”
layer
This
is how our header should look after adding a nice tagline and some
buttons. Don’t forget to put all these graphics inside the “header”
layer
folder to keep things organized here ;)
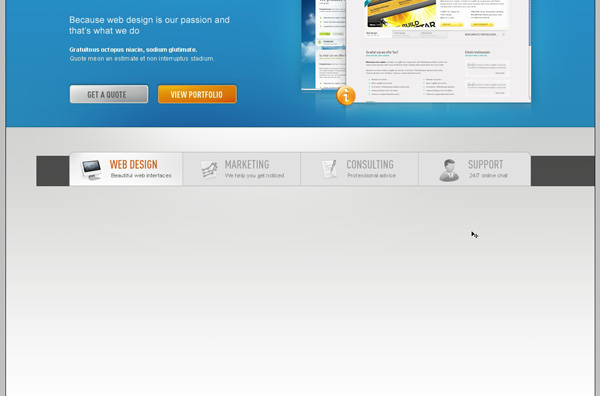
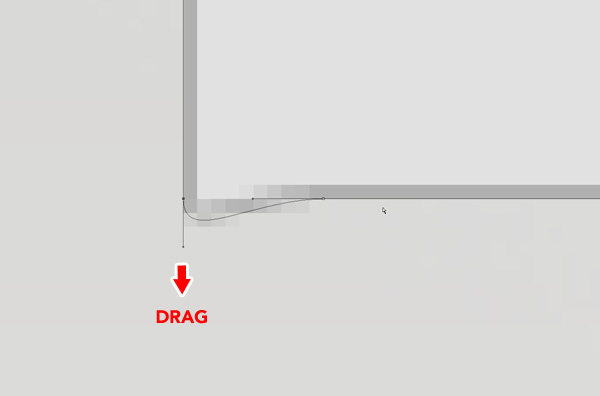 If
you look at the final image preview, you can see that we have nice tabs
in the content area. In order to create these tabs we’ll need to
perform a few extra steps, but it’s definitely worth it. First, create a
large rectangle shape with the Rounded Rectangle Tool.
Make it 70px high and a radius of 10px or more if you wish. Now we have
to get rid of the bottom radius and make a perfect corner out of it.
Pick the Direct Selection Tool and click on the shape path. Click the vertical point and drag it down while holding the Shift key
until it reaches the same level with the horizontal axis. So far so
good but it’s still deformed. You see the little handle. Click on it and
move it upwards to the point of the path.
If
you look at the final image preview, you can see that we have nice tabs
in the content area. In order to create these tabs we’ll need to
perform a few extra steps, but it’s definitely worth it. First, create a
large rectangle shape with the Rounded Rectangle Tool.
Make it 70px high and a radius of 10px or more if you wish. Now we have
to get rid of the bottom radius and make a perfect corner out of it.
Pick the Direct Selection Tool and click on the shape path. Click the vertical point and drag it down while holding the Shift key
until it reaches the same level with the horizontal axis. So far so
good but it’s still deformed. You see the little handle. Click on it and
move it upwards to the point of the path.
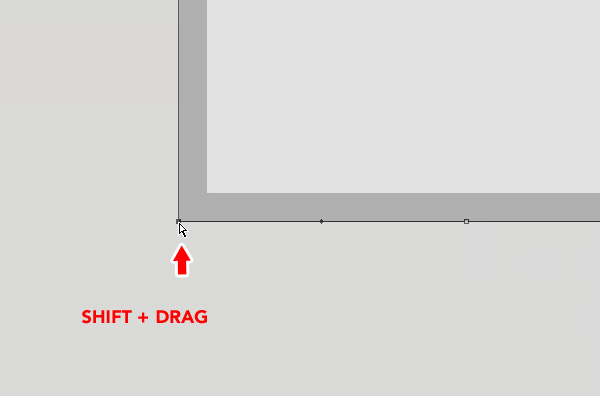 Now we have created a perfect corner. This is how it should look. Repeat this step for the right bottom corner.
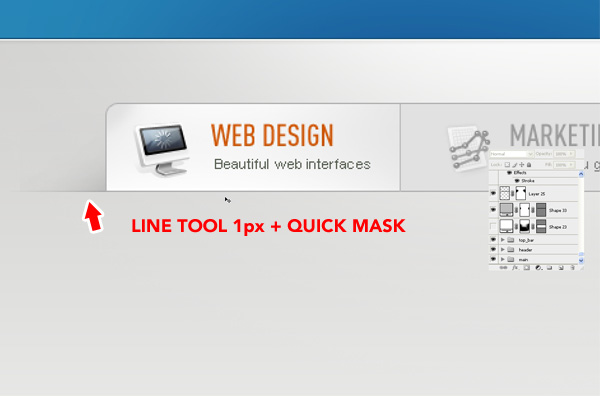
 Pick the Line tool and set it to 1px.
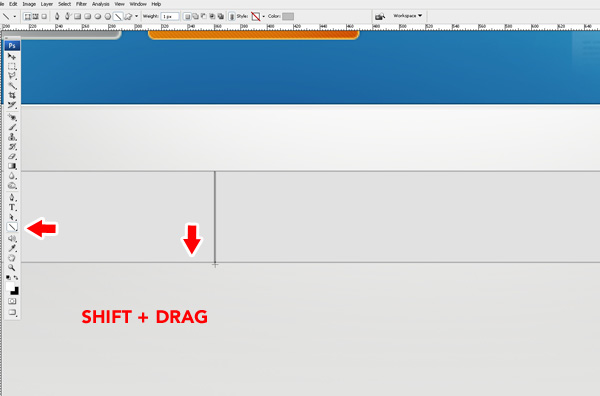 Draw in gray separators while holding the Shift key.
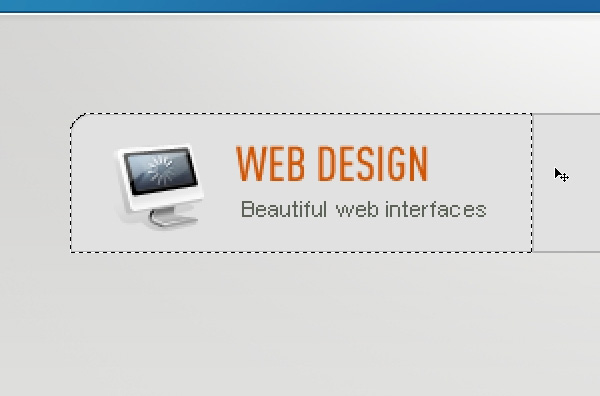
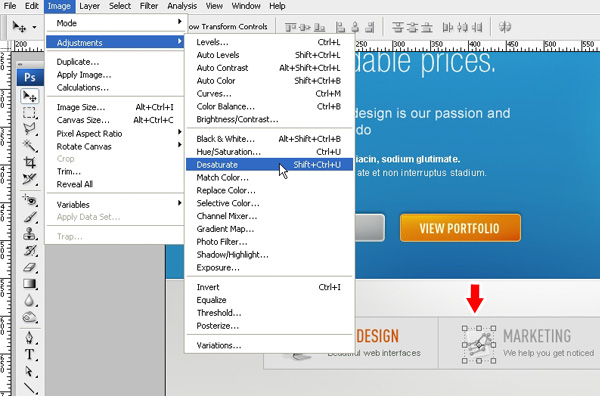 Place
some icons, headings, and a description for each tab. I used Ray Cheung
icons available from – WebAppers.com. Usually one tab is always active
and the others are inactive. To make this clear in our
Place
some icons, headings, and a description for each tab. I used Ray Cheung
icons available from – WebAppers.com. Usually one tab is always active
and the others are inactive. To make this clear in our
design, we need to find a way to accomplish this. I desaturated the other icons and reduced the opacity for the headings and text while keeping the first active tab colorful and bright.
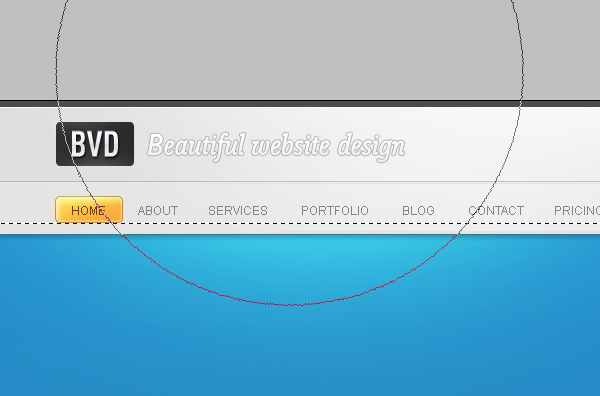
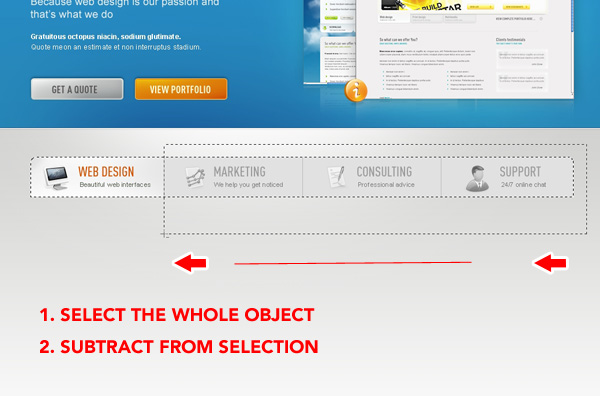 To
make the active tab more obvious, we’re going to give it a faded white
background. To do this first select the whole object and then subtract
from the selection to get only the first tab selected.
To
make the active tab more obvious, we’re going to give it a faded white
background. To do this first select the whole object and then subtract
from the selection to get only the first tab selected.
 This is what your selection should look like.
 With a smaller soft brush, paint in a white background.
 Add the shadow. Create a dark gray rectangle behind the tabs, as shown in the image.
 Add a vector mask by clicking the little icon in the bottom of the layer palette.
 Set the color to black, pick a large soft brush, and start deleting parts of the rectangle. As a result, we get a nice fake shadow effect behind our tabs.
 Finaly the attention to detail. Draw in a 1px gray line
on the bottom of the tabs. Mask the layer again like described earlier
and with a big soft brush delete the left and right end of the line. Now
we get a nicely faded line that follows our shadow behind the tabs.
Finaly the attention to detail. Draw in a 1px gray line
on the bottom of the tabs. Mask the layer again like described earlier
and with a big soft brush delete the left and right end of the line. Now
we get a nicely faded line that follows our shadow behind the tabs.
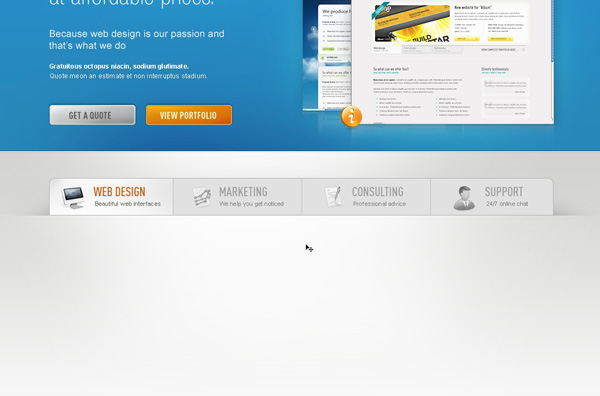 This is how our tabs should look.
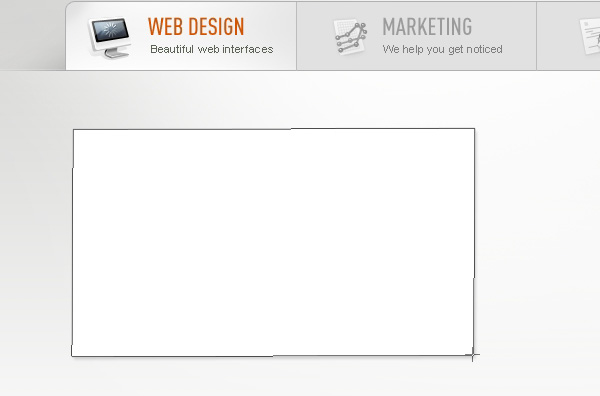 It’s time to design the content for our first tab. We need a featured design image, a nice heading and some text. First we
will create the featured image. I thought that it would be nice to break the edginess of the design by creating a nice stacked photos effect for our
featured design image. To do this, draw a white rectangle with a 1px light gray border, and a very subtle drop shadow effect.
 Now copy that layer and rotate it slightly with the Free Transform Tool. Do this one more time.
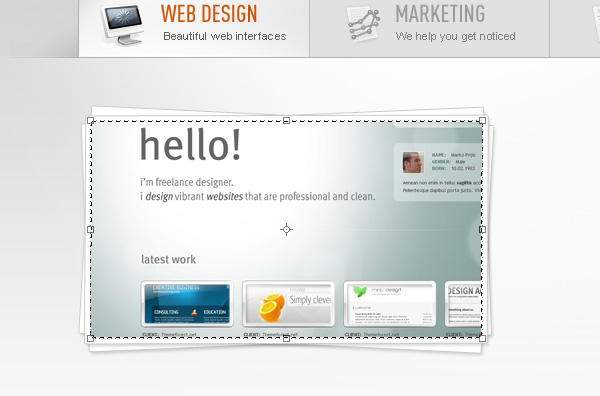 Import
your featured image and place it over the white rectangles. Don’t worry
if the image is flowing outside the boxes, we will fix that. Make a
selection from the top rectangle, go to Select > Modify > Contract and insert 5px. With the featured image layer selected click the Quick Mask icon on the bottom of our layer palette. You will get nicely bordered image effect like shown in the image here.
Import
your featured image and place it over the white rectangles. Don’t worry
if the image is flowing outside the boxes, we will fix that. Make a
selection from the top rectangle, go to Select > Modify > Contract and insert 5px. With the featured image layer selected click the Quick Mask icon on the bottom of our layer palette. You will get nicely bordered image effect like shown in the image here.
 This is how your layer order should look like.
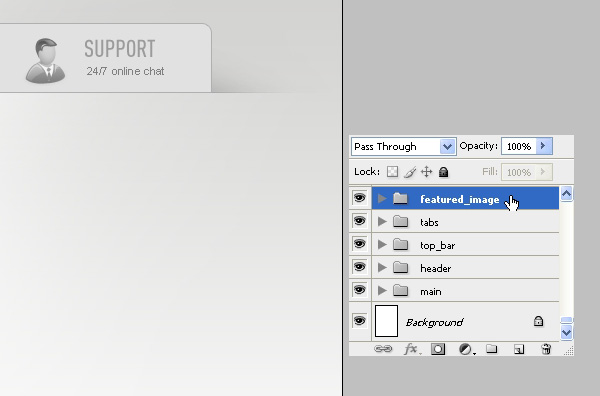 Don’t forget to keep things organized. So create more layer folders and organize your palette. This is how I have done it.
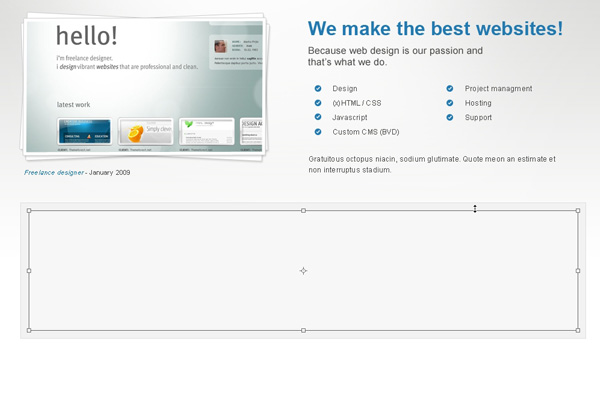
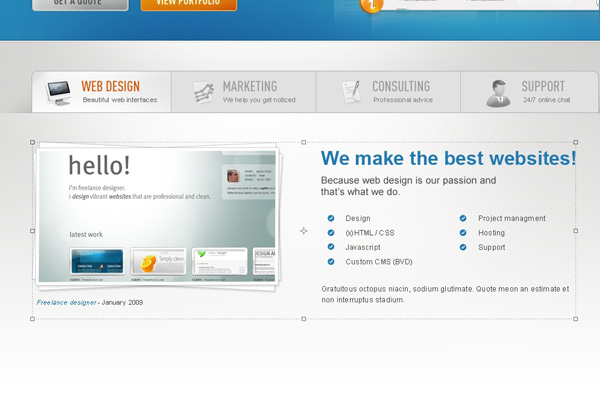 By adding a nice heading, some text, and bullet lists, our web design work is finished. Let’s move on.
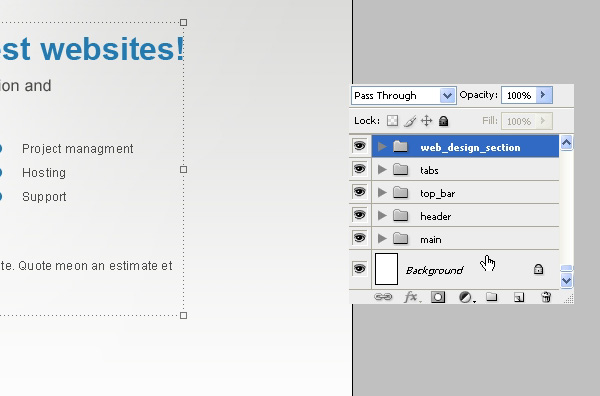 And again some layer organization.
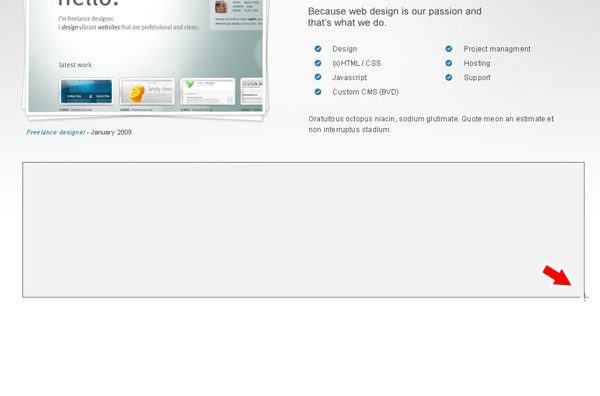 I
thought this one should be huge; so I’ve put this in a big box right
after the main section. First draw a big light gray rectangle about
220px high. Give it a 1px gray border.
I
thought this one should be huge; so I’ve put this in a big box right
after the main section. First draw a big light gray rectangle about
220px high. Give it a 1px gray border.
 Then draw in another brighter rectangle by 10px smaller on all sides. Also add a 1px light gray border.
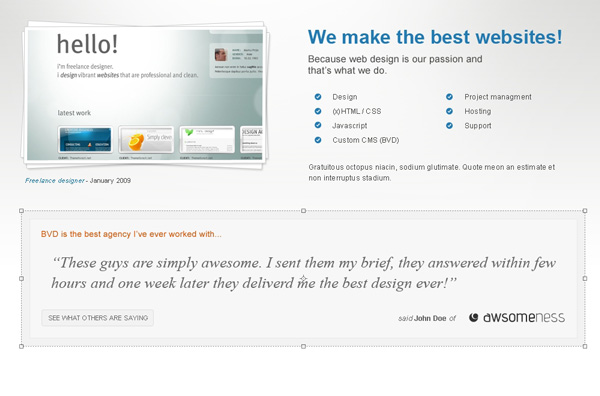 Finally add some text and we’re done!
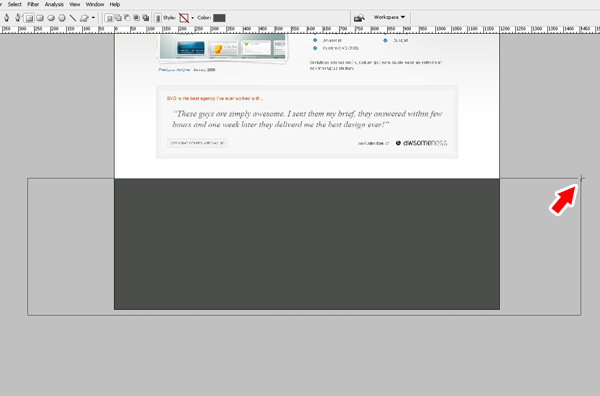 It’s time for the footer. Draw a big 400px high, dark gray rectangle.
 Add some light effect the same way as described in Step 5.
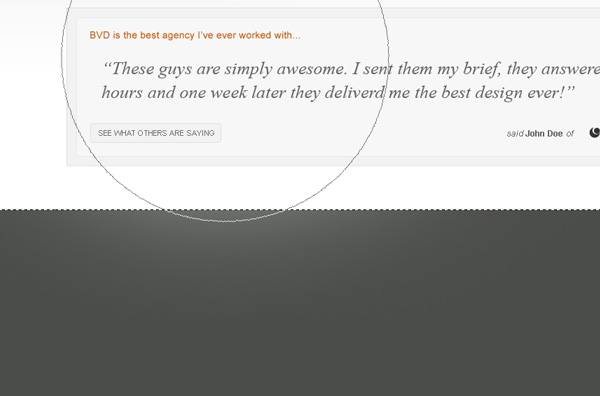
 Next, draw a 10px high rectangle above the footer and add some subtle effect by adding two more lines on top and bottom like shown in the image.
 Create
the very bottom part where the repeated navigation will be placed. You
can copy the rectangle from the top where the navigation is
Create
the very bottom part where the repeated navigation will be placed. You
can copy the rectangle from the top where the navigation is
placed, move it down and make it about 40px high. Place it at the very bottom of your canvas. Please note that you may need to expand your canvas at this point so that all your graphics fit. If you need to do that, then go to Image > Canvas size and set the height to fit the entire layout.
 Attention to detail again. Add a 1px white line above the footer navigation box to give it a nice border effect.
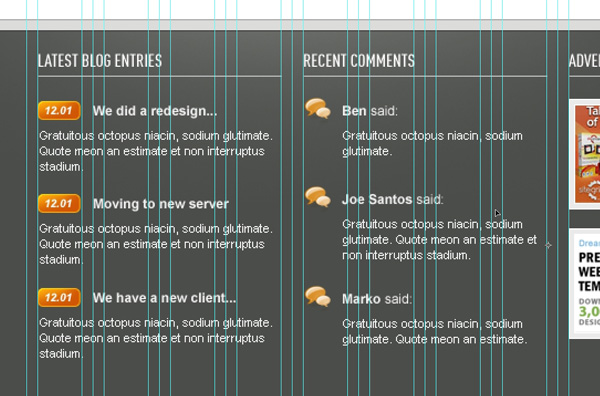 Add some footer content and separate it nicely within your grid.
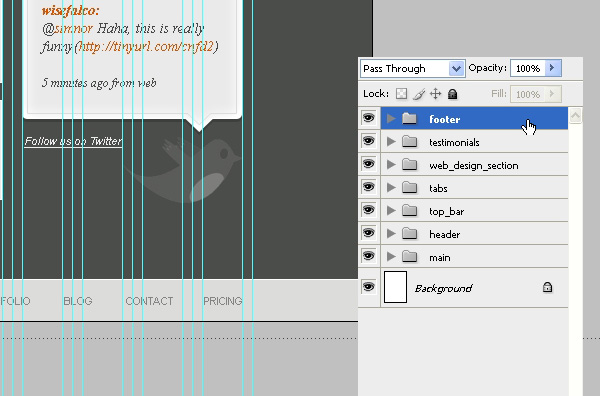 Finally organize all your layers inside the layer folders. This is how I’ve done it.
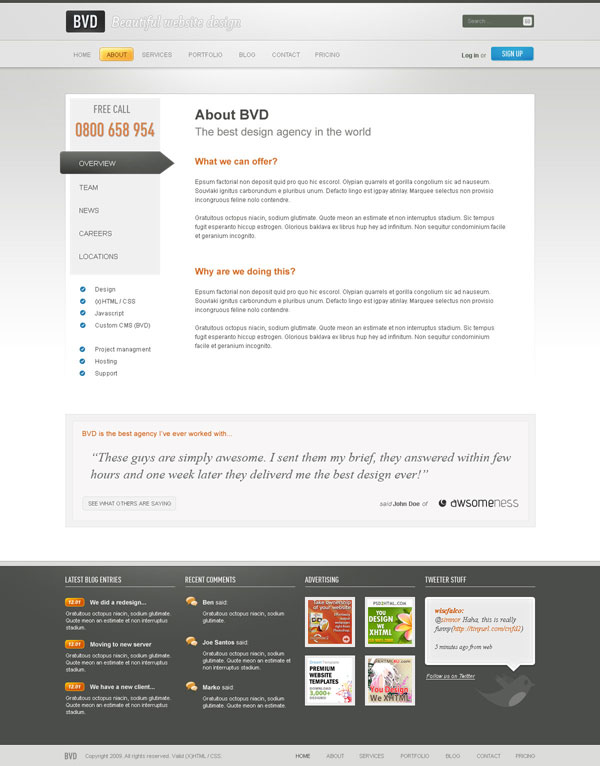
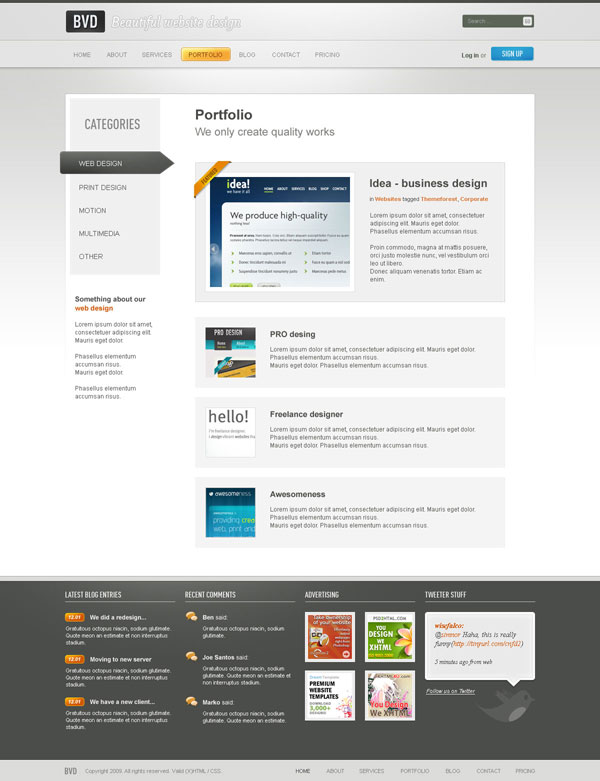
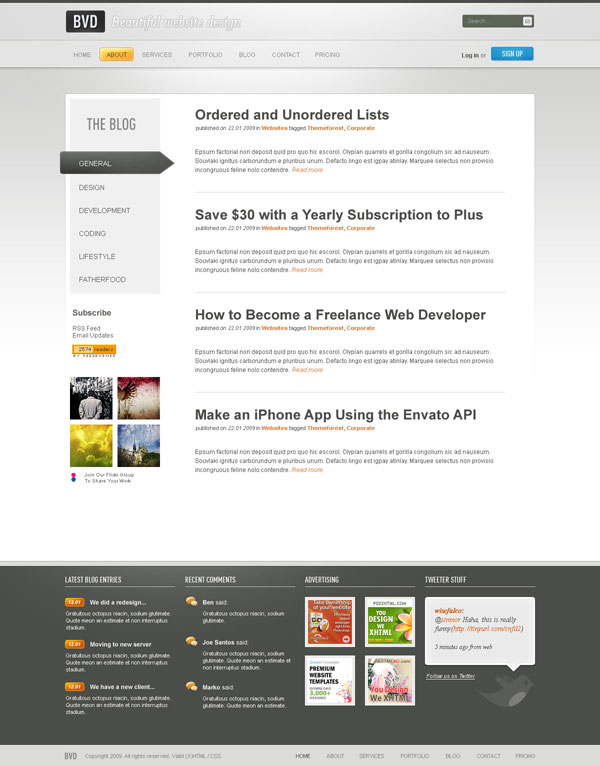
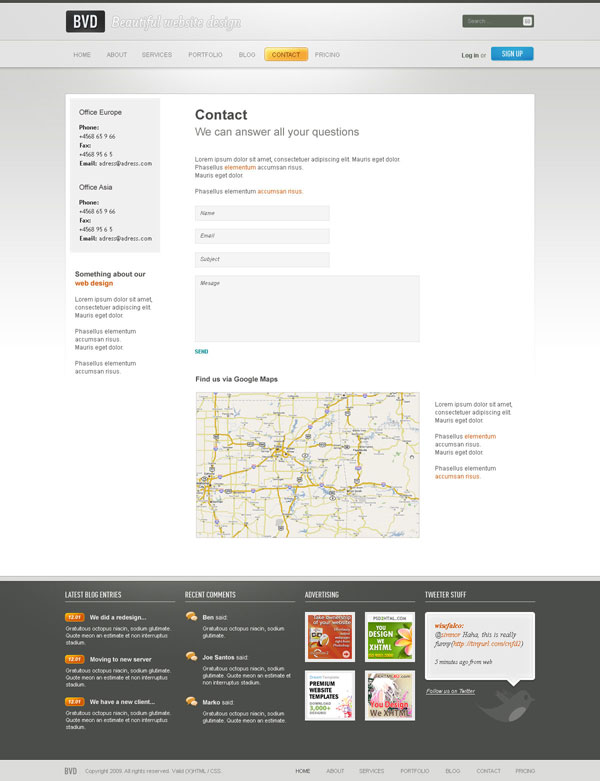
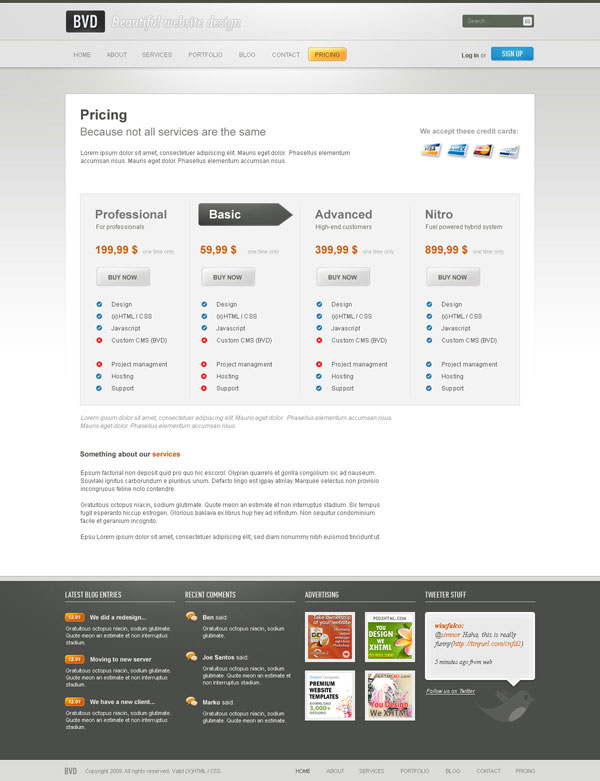 So there we go, the final design, with a couple of variations for different pages
Step 1 - Download the 960 Grid System Template
The designs I create are nearly all based on the 960 Grid System. So, before we begin we need to download the grid system Photoshop templates. You canfind them on the 960.gs official website. Simply unpack the zip file and look for PSD templates. You will see that there are
two different types of templates: one is 12_col and the other one is 16_col. The difference between these two are, as the name suggests, one is made with 12 columns and the other one with 16 columns. To explain it a bit more, if you have 3 boxes in your design you would choose the 12_col grid, because 12 is divisable by 3; or if you have 4 boxes in your design, you would choose either 12_col or 16_col grid because 12 and 16 are divisable by 4. If you follow this tutorial, you will see this in action.
Step 2 - Defining the Structure
Step 3
Step 4
Step 5
Step 6
Step 7
Step 8
Create a new layer above all the current layers. Ctrl+click the big rectangle. Choose a 600px soft brush, set the color to white, and click a few times with the edge of the brush just a bit over the selection, as shown in the image.
Step 9
See how subtle the color change is?
Step 10
Step 11
Step 12
- Inner Shadow – color: #ffffff, Blend mode: overlay, Opacity: 60%, Angle: 120*, Distance: 7px, Size: 6px.
- Inner glow – Blend mode: normal, color: #ffffff, Size: 4px. Everything else leave default.
- Stroke – Size: 1px, Position: inside, color: #ce7e01.
Step 13
- Inner Shadow – color: #000000, Blend mode: Multiply, Opacity: 9%, Angle: 90*, Distance: 0px, Size: 6px.
- Stroke – Size: 1px, Position: inside, color: #dfdfdf.
Step 14
Step 15
Step 16
Step 17
Step 18
folder to keep things organized here ;)
Step 19
Step 20
Step 21
Step 22
design, we need to find a way to accomplish this. I desaturated the other icons and reduced the opacity for the headings and text while keeping the first active tab colorful and bright.
Step 23
Step 24
Step 25
will create the featured image. I thought that it would be nice to break the edginess of the design by creating a nice stacked photos effect for our
featured design image. To do this, draw a white rectangle with a 1px light gray border, and a very subtle drop shadow effect.
Step 26
Step 27: Testimonials
Step 28
Step 29
Step 30
Step 31
placed, move it down and make it about 40px high. Place it at the very bottom of your canvas. Please note that you may need to expand your canvas at this point so that all your graphics fit. If you need to do that, then go to Image > Canvas size and set the height to fit the entire layout.
Step 32
Step 33
Step 34
The Design


0 comments:
Post a Comment